Insights From Designing The Battery's High Voltage Controller
Since September of last year I’ve been designing the High Voltage Controller (HVC) for UBC Solar’s V4 battery pack. Throughout this process, several insights and design philosophies have emerged that I think are worth sharing. Many of these insights are high-level and applicable to projects in other domains, not just PCB design.
Some of these points may sound obvious, but the hard part is not reading and remembering them. It’s actually having these lessons ingrained into your head that takes a while. It’s very easy to tell new engineers or design team members to not make mistakes like shorting batteries, but unless those lessons are beat into your head it may be very difficult to avoid them!
Connect Your Project To Team Goals
At the beginning of every Saturday Meeting, our team captain, Tima Komarov, goes over a slide that states the goals of the team. One of these is achieving Top 5 at the Formula Sun Grand Prix in the summer of 2027. This is a high level goal, but each UBC Solar member must know how their work contributes to it. Knowing the high level goal allows members to independently make design decisions for their own projects.
For the High Voltage Controller (HVC), it’s fairly clear how it contributes to the overall goal. Without a board that controls our battery pack, we won’t be able to drive the car. So, such a component is on the critical path to achieving our goal.
In some cases, it might not be clear exactly how a project is contributing to the success of the team. In such cases, it’s extremely important for the member running the project to ask questions and figure out how to connect their day-to-day work to the long-term success of the team. Otherwise, it’s very easy to fixate on low-level details and lose sight of if your work is actually useful.
Case Study: My First UBC Solar Project
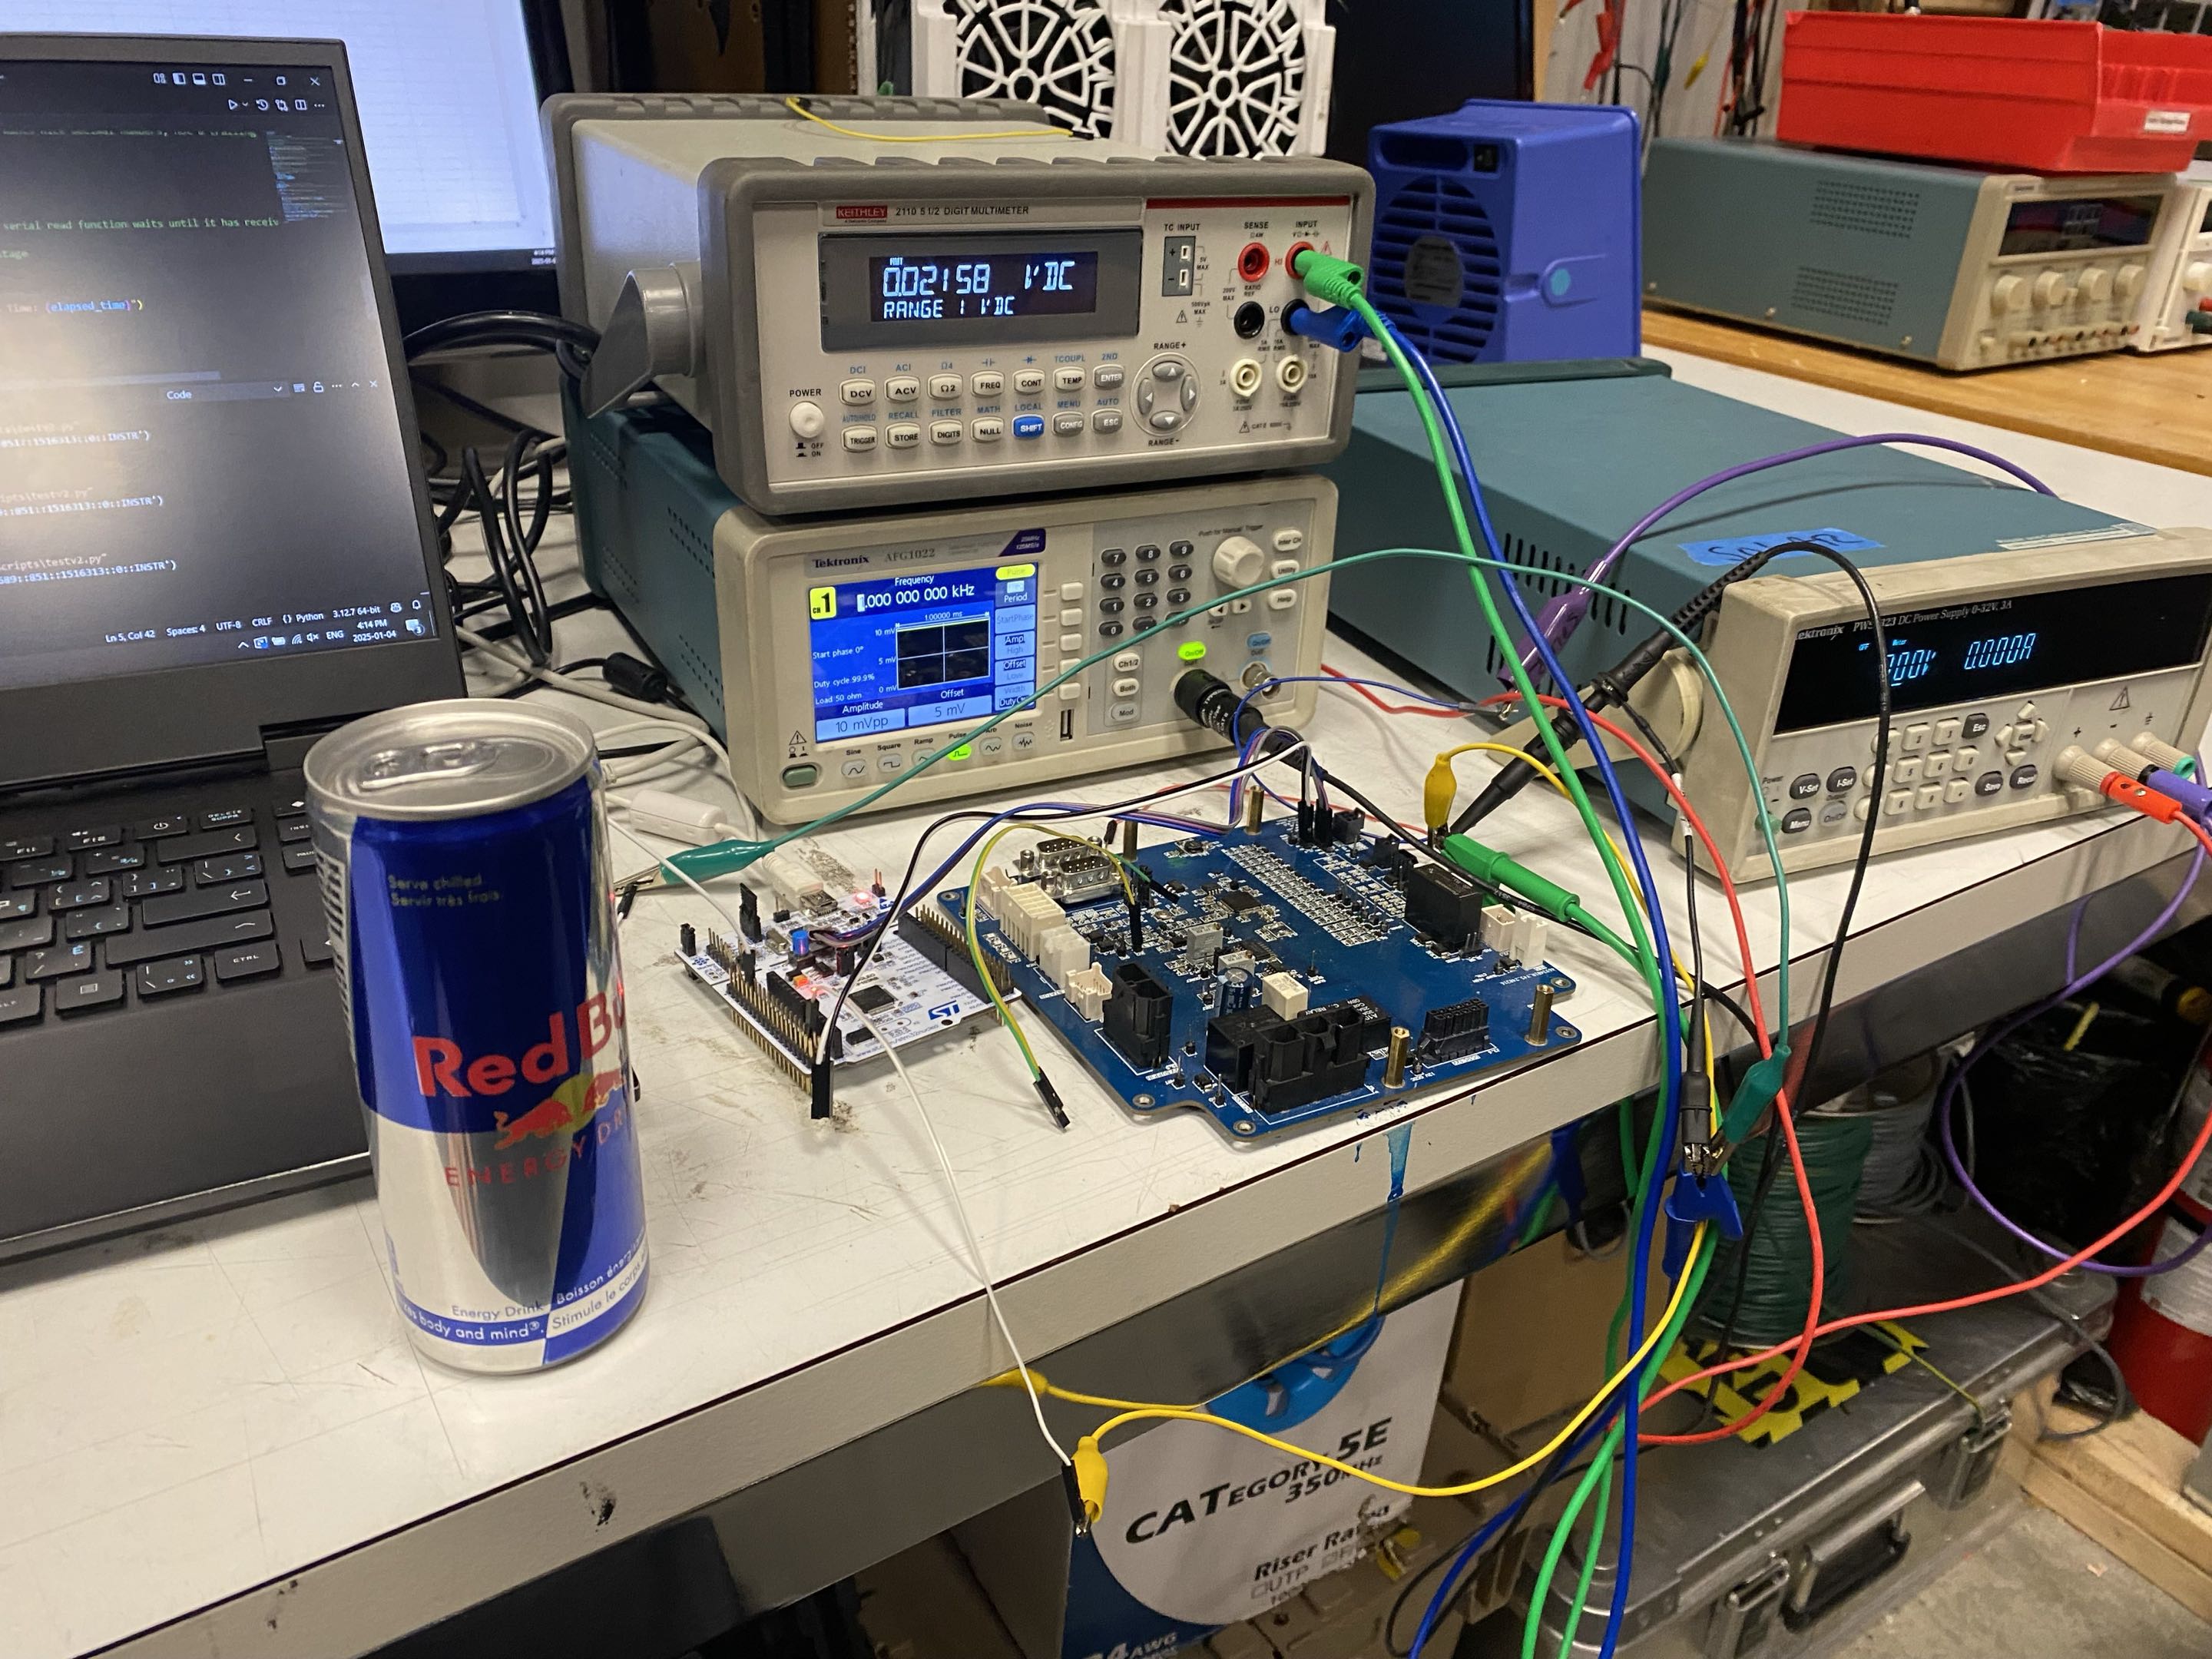
Automated test setup I developed for characterizing our previous generation battery pack’s current sensor
An example of this is my first project on the team, characterizing our previous generation battery pack’s current sensor to minimize its error.
This project dragged on for months while I developed an automated testing setup (shown above) for characterizing the current sensor. This involved understanding the functionality of the current sensor and the board that reads it, writing firmware, and software to read from our instrumentation. All of this work went on while I had no clear requirement for how accurate the current sensor needed to be, and no clear timeline for when it should be completed.
While this was a great learning experience, not connecting the day-to-day work on the project to higher-level team goals during that term (preparing for our next competition) caused the project to drag on for months longer than expected. In these months, I could have been doing other work that would have prepared our battery pack for the next competition.
MVPs vs MMRs
Part of connecting your work to the goals of the team is understanding what work is required and what features are nice to have. On Solar, we often use the terms MVP (Minimum Viable Product) and MMR (Minimum Marketable Product) to distinguish between these two categories. The MVP is the minimum set of features required for the product to be functional, while the MMR is the minimum set of features required for the product to be marketable or competitive.
Every member on the team must understand what an MVP looks like for their project. This is the minimum set of features that must be implemented for the car to drive at competition. Before other work is attempted, the designer should be working towards the MVP and ensuring that it is completed on time. Once it’s guaranteed that your project will have the MVP features by the deadline, then other MMR features can be added.
An easy test you can run to determine if a given feature is an MVP or MMR is to ask yourself if competition were in a month, would you develop the feature? A month is such a short timeline that you must only work on features that are strictly required for the car to drive.
Notice this framework doesn’t restrict a project to only having MVP features on its first revision. The limiting factor is your timeline. So, if time permits, extra features can be added in the first revision.
Case Study: HVC Current Sensing
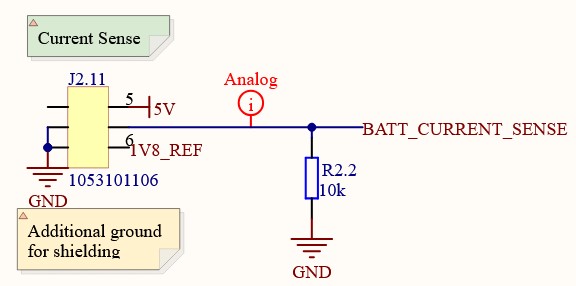
Above is the current sensing circuitry on the previous battery pack’s control board

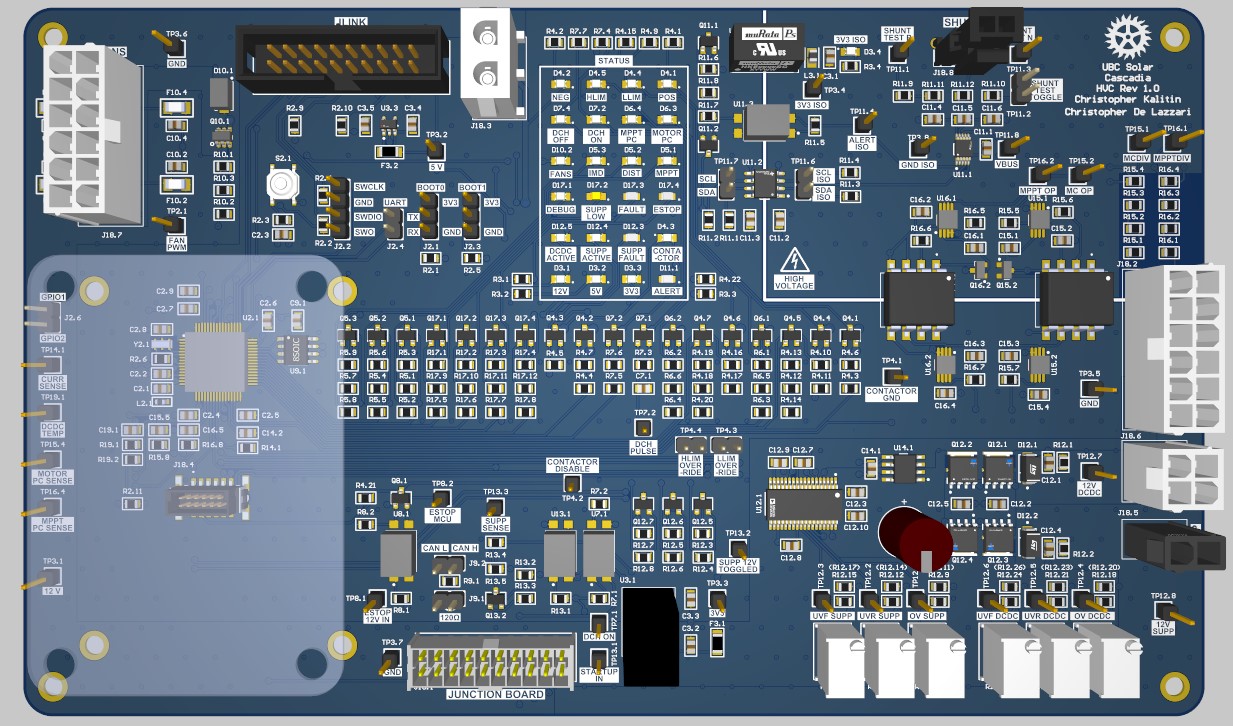
For illustrative purposes, above is the current sensing circuitry I implemented on the HVC. Far more complicated!
On the HVC, this meant implementing a shunt current sensor and a power path prioritizer in the first revision of the board. These features are not strict requirements to achieve functionality and add significant design and testing time. However, there were 8 months allocated to the HVC project, so there was enough time to implement these features in the first revision.
Due to the nature of PCBs, such schedule margin is also likely the only time when MMR features will be added. Once your board is working, it’s unlikely that the best use of your time will be to revisit the same project and add a couple of extra features. Each PCB revision imposes a opportunity cost, so it’s often more useful to move onto the next project. This is in contrast to a field like software (where the terms MVP and MMR originate), where adding an additional feature can be done with a one-off PR and doesn’t mean potentially spending weeks rerouting your PCB.
Define Your Interfaces
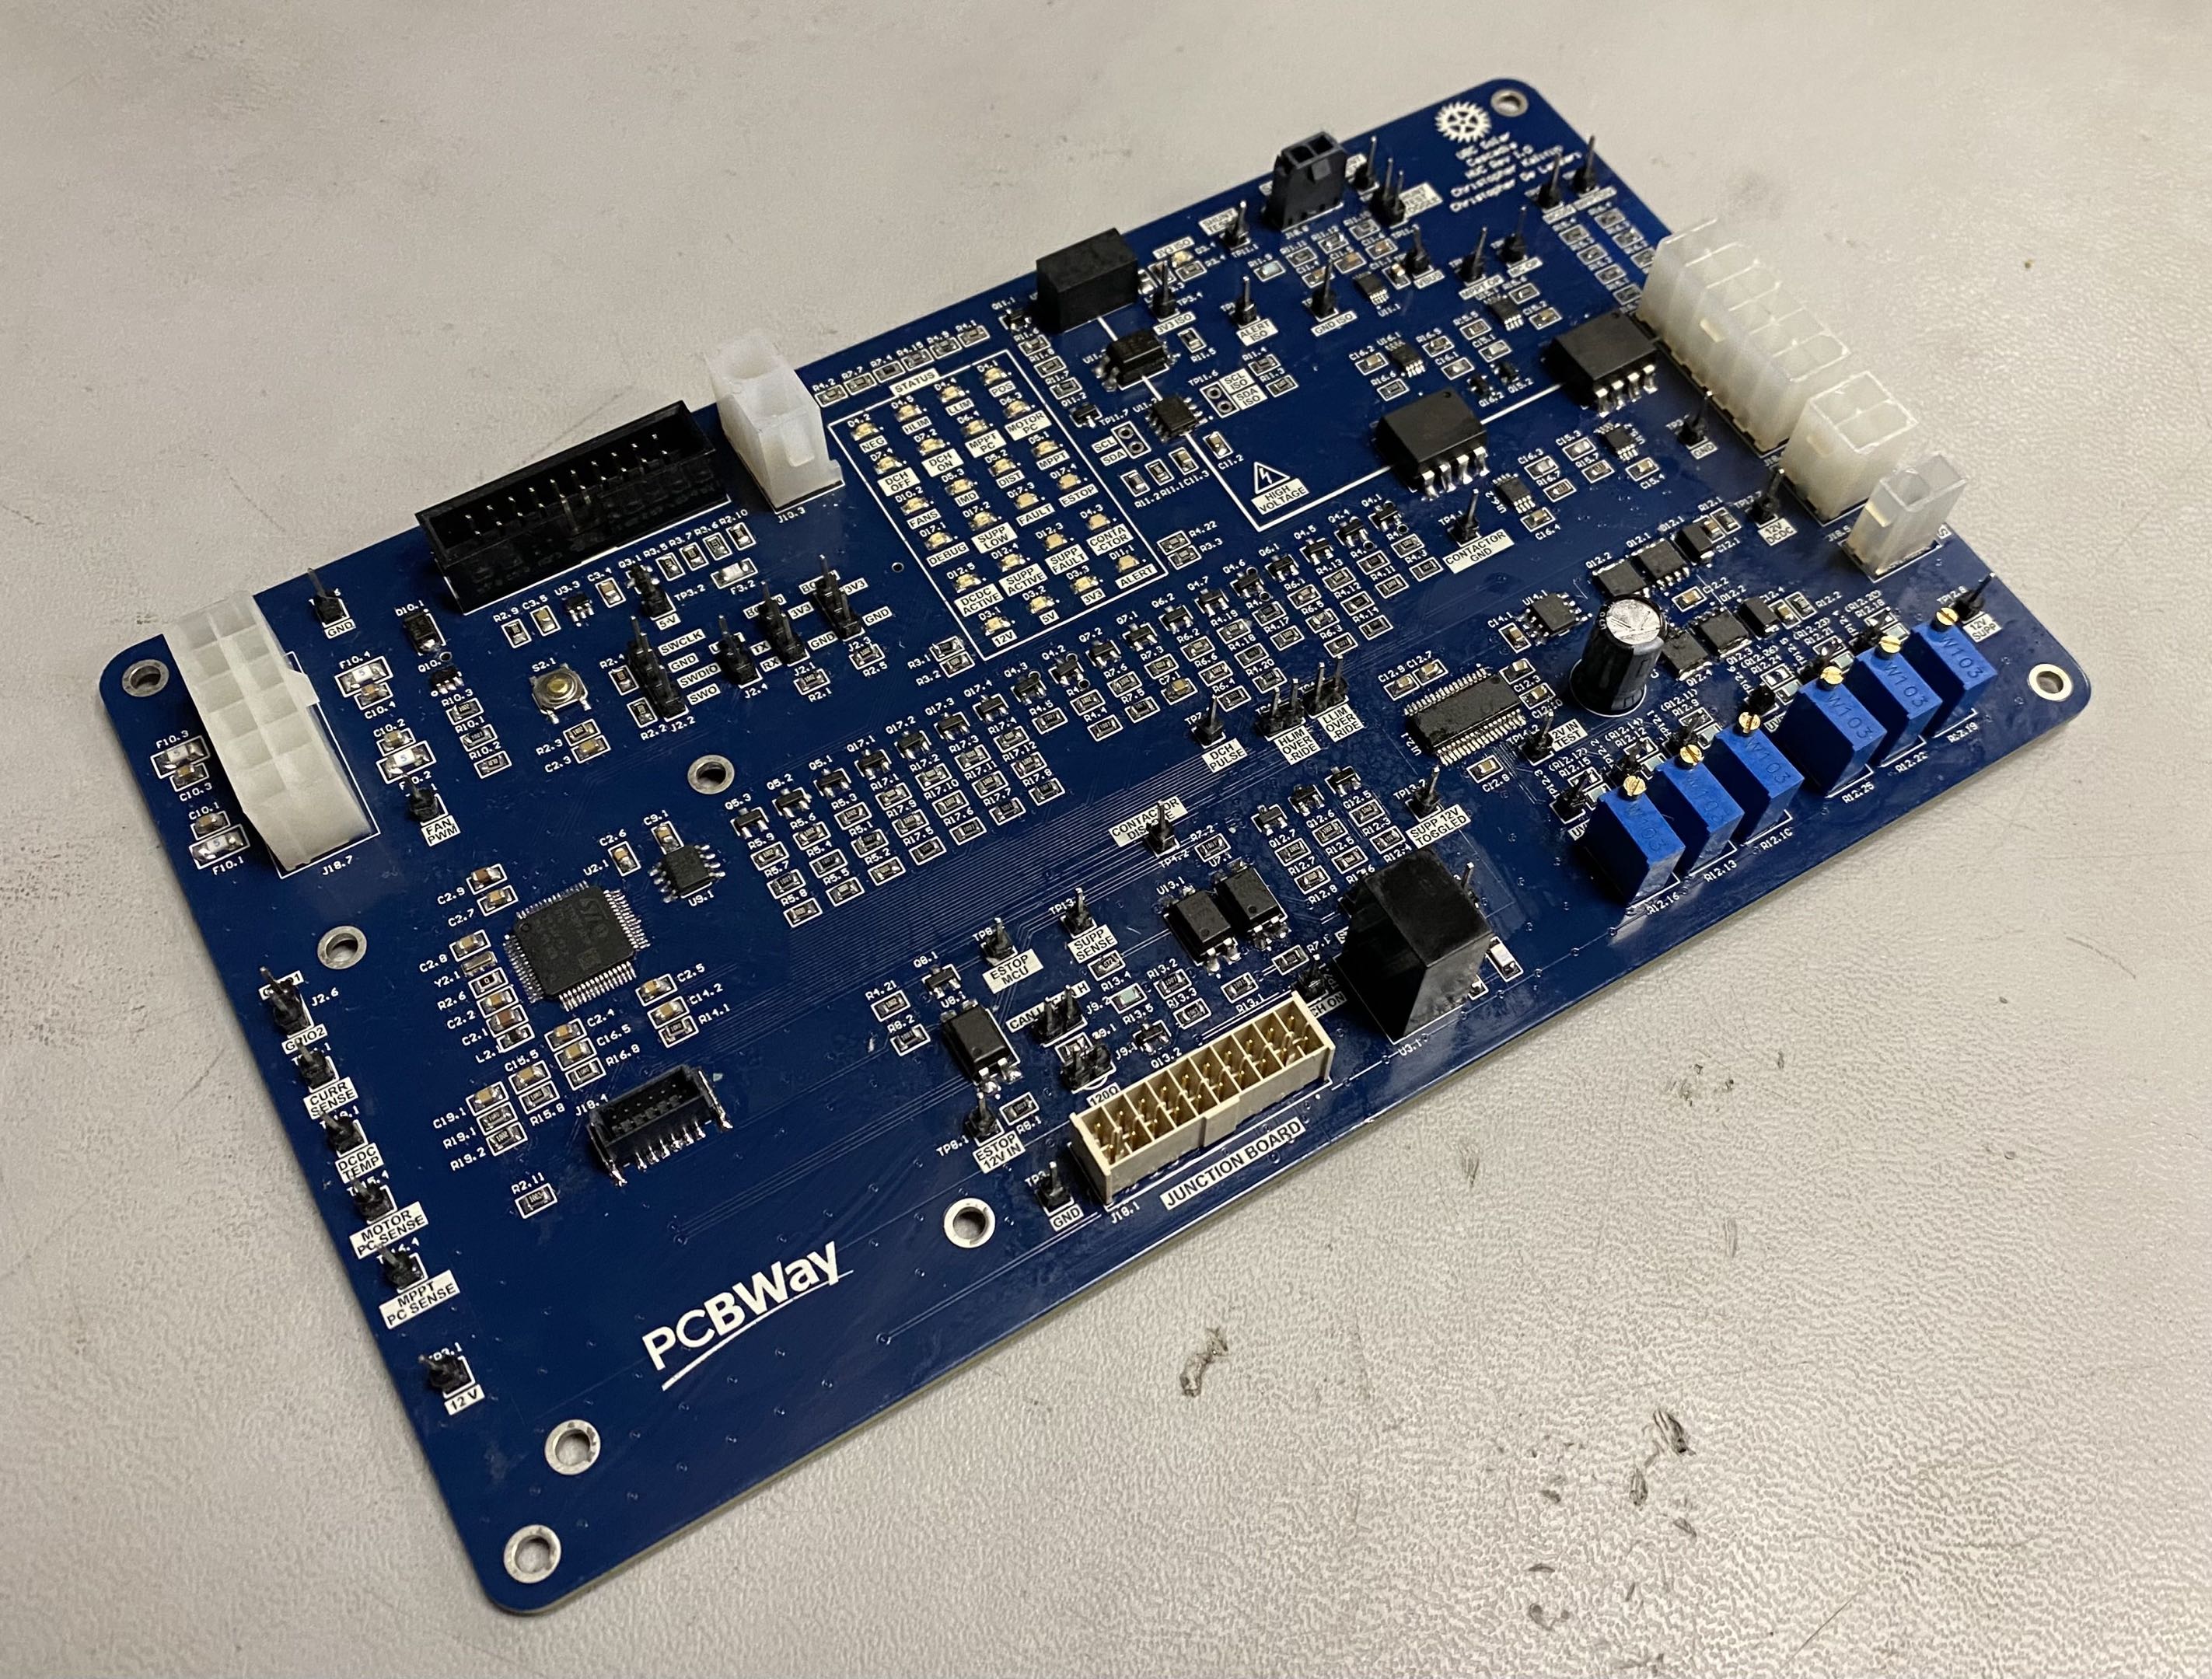
The HVC’s connectors are its most important interfaces.
Observing other projects on UBC Solar, I’ve noticed that the most important thing for a project to go smoothly is to define the interfaces early. This is partly a project management step, along with technical considerations.
Your interfaces could be connectors, people, bolt locations, or any number of things. Once you have well-defined and unchanging interfaces, you can work inside your interfaces and not worry about making changes that impact other people or other people’s changing impacting you. This allows you to work independently and at your own pace (which may be much faster than others).
I learned this lesson from listening to Joe Justice, and he explains part of the concept in this clip. I highly recommend watching every talk he’s done.
On the HVC, this involved defining connectors and their pinouts early. There are many other PCBs in the battery that the HVC interfaces with including the Junction Board, Masterboard, Contactor Boards, etc. Defining the connectors between all of these boards allows all designers to independently work without worrying about making changes.
Case Study: DCDC Sizing and Battery Pack Fans
If you leave an interface undefined and floating, you are inviting it to potentially greatly delay your work in the future. One example of this was sizing the DCDC Converter for our next generation battery. The DCDC converts raw high voltage from our battery pack into 12 V that all of our PCBs and microcontrollers can use.
Our Battery Mechanical team has been working to choose fans for the next battery pack and balance air flow rate, cooling, and current consumption considerations. We didn’t set an explicit max current the fans could use for over a month, which meant I had great difficulty deciding on which DCDCs would be suitable for us. If every week the fan current changes, then the DCDC selection must also change.
In the end, we decided on 2 A as the max fan current, which allowed me to finalize DCDC selection while the Battery Mechanical team could continue iterating on fan selection without worrying about my work.
Case Study: Masterboard Mounting Holes
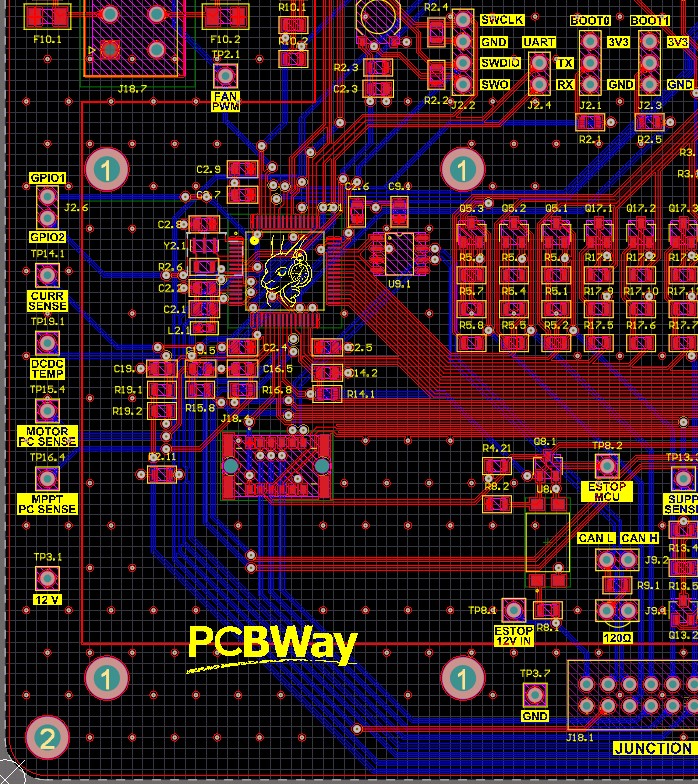
The Masterboard is mounted on top of the HVC on standoffs at the holes labelled “1”
Mounted on top of the High Voltage Controller PCB (HVC) is the Masterboard, which provides the HVC with temperature and voltage information from the battery cells. The Masterboard is mounted on standoffs that are screwed into the HVC. So, before routing could be done the Masterboard designer, Michael Lin, and I had to agree on the location and size of the mounting holes.
I picked out this example because once we set this interface, we were locked into the general size of the Masterboard. Changing the size of the Masterboard by a considerable amount would mean rerouting sections of the HVC, which could take a significant amount of time.
For example, as the image above illustrates, if Michael wanted an extra centimeter or two of width or height, it would have conflicted with existing connector placement on the HVC. In the end, we only added 2 mm of width to the Masterboard, so we were able to avoid any major issues. Let this be a lesson in correctly defining your interfaces early. If you define them incorrectly you may experience great pain in the future.
You Must Be The Expert
“The basic concept of always keeping authority and responsibility together never changed. […] We made certain that each member of the project thoroughly understood his part in our total effort.”
- Leslie R. Groves, Now It Can Be Told, The Story of the Manhattan Project
No one on the team should know more about your project than you. This means you must be the source of truth for your project and be able to answer anybody’s questions the instant they ask them. All requisite information must be loaded into your head at all times.
The reason you must understand all aspects of your project is that you are the lead designer of it. Responsibility in the end falls on you, so you must be the one who is most fit to make any design decisions. This doesn’t mean that others won’t have useful input, but you are the one that makes the decision in the end and you must make the correct decision, which is impossible unless you have all the context for the project loaded into your head while making the decision.
Part of being the expert on a given project is that you must have a very clear mental model of the system you’re working on. You should understand the functional blocks and interfaces of your system, how they interact with each other, and edge cases. The best way I’ve found to do this is have a big flow diagram in your mind (or, even better, documented somewhere so others can use it). This allows you to quickly understand how changes to one part of the system will affect other parts of the system.
Case Study: Leading Experts On Their Own Projects
We can consider this from a leadership perspective as well. If you are the lead of a subteam you should be optimizing for training up many members to be experts on their own individual projects, and how these projects fit into the overall system. This should also be the goal of recruiting, to identify people who could become experts on their own projects, and then to train them and give them all required information / context to be the expert on their projects.
As the lead of members who are the experts on their own projects, your role is giving input and advice and clearing roadblocks. If the members are the most competent people on the team to complete a given project, then they should be given the freedom to make their own design decisions and be the ones responsible for the success of their projects. Note that as a lead your goal should be to ensure that your members know more about their own projects than you do, so that they can make the best decisions for their projects. If you as a lead are not the one with the most context about a project, then you are not the one who should be making the final design decisions.
As a lead, your role is one of course correction, high-level management, and clearing roadblocks. Check-ins with competent members who deeply understand their projects should be focused on ensuring the project is still on the right track for the high-level goals of the subteam and integration with other members, not necessarily on low-level design decisions. Our Electrical Director, Aarjav Jain, does a great job of keeping his meetings with individual designers on this topic, and not necessarily using his time as Electrical Director for scrutinizing low-level design decisions like component selection.
Case Study: Copy Pasting Designs and Language Models
Throughout the design of the HVC I often consulted my favourite language models and the design of previous PCBs on the team. These are great resources for learning about how to design a PCB and for getting ideas for how to implement certain features. Language models are particularly good at suggesting ICs I could use for certain functions, and giving implementation details for how to use those ICs.
However, any time you’re outsourcing your thinking to a previous Solar member (who may not be on the team anymore) or a language model, you must remember that in the end you are the one who will have to be in the bay at 2 am debugging your board. Or, worse, pulling an all-nighter the night before competition desperately trying to fix a critical issue with the board you designed, with no one else to ask for help. This desperate moment at 4 am is what you should be optimizing for and why you must be the expert on your project.
You Should Know The History Of Your Projects
“Civilization is not inherited, it has to be learned and earned by each generation anew. If the transmission should be interrupted for one century, civilization would die and we should be savages again. If progress is real, it is not because we are born any better or wiser than infants were in the past, but because we are born to a richer heritage, born on a higher level of that pedestal, which the accumulation of knowledge raises as the ground and support of our being.”
- Will & Ariel Durant, The Lessons of History
Every single problem you face on a design team has been felt by great numbers of previous members. You stand on the shoulders of giants who have faced the same problems and come to the same conclusions as you. The blog post you just read undoubtedly contains insights that have been felt by many previous members. This includes our previous Electrical Leads Saman and Mischa who have written their own blog posts about UBC Solar with some overlap in insights with this post.
By learning the history of previous projects in the same space as yours, you start at a higher level of knowledge and understanding than previous members did when they started from scratch. This allows the team to progress much faster and avoid making the same mistakes as previous members. As Will Durant describes in the quote above, this is also why you should learn history more generally, but in this context specifically technical history related to your project.
If you’ve read this entire blog post and are not on UBC Solar, consider applying next recruiting cycle! Your probability of getting on the Battery Management System subteam (or any other subteam) has greatly increased by simply putting in the effort to read UBC Solar’s blog!